Introduction
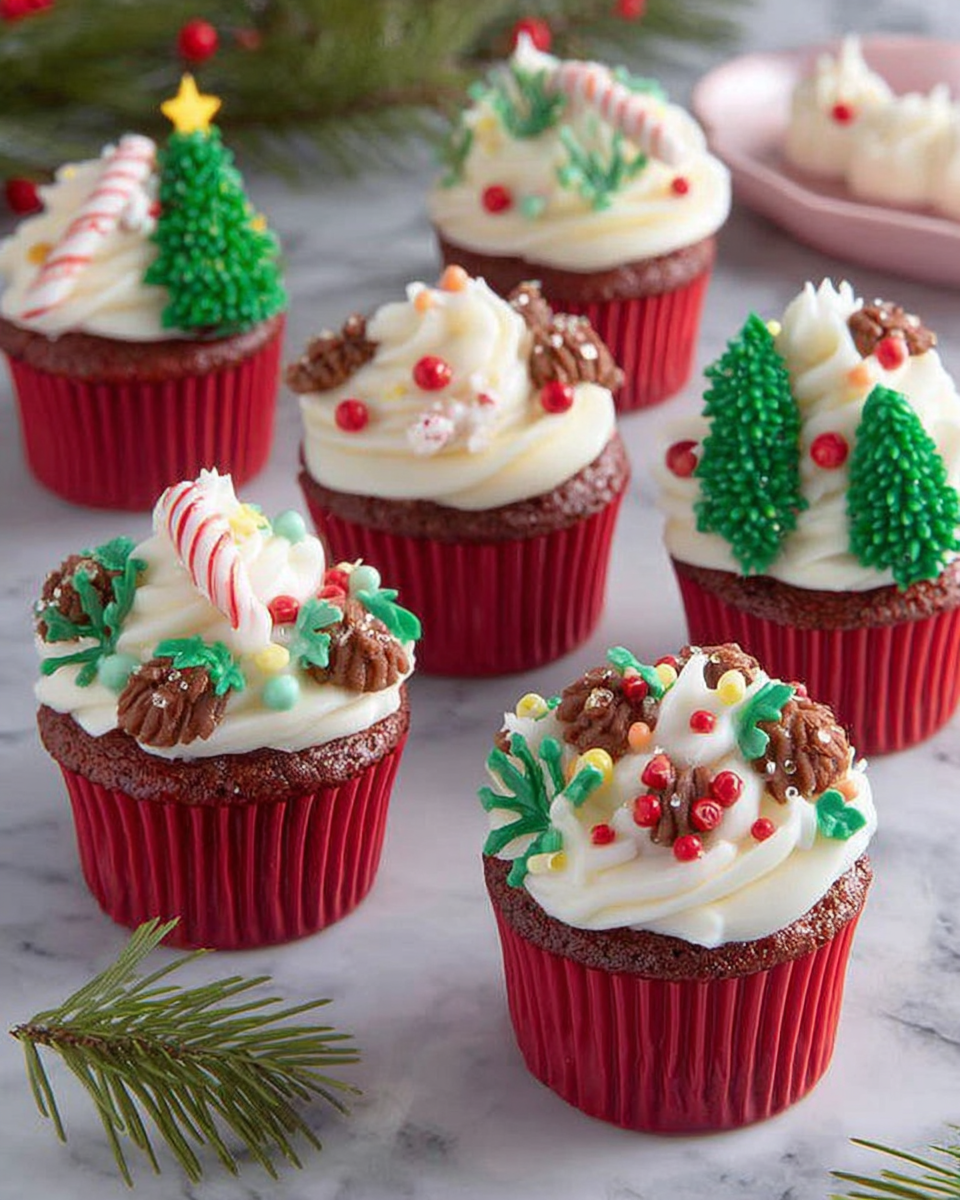
Red Velvet Crinkle Cookies combine the festive spirit of rich red velvet with the delightful chew of a crinkle cookie. With their striking appearance and fudgy texture, they're a perfect treat for any celebration. These cookies encapsulate everything we love about the holiday season, making them an irresistible choice for home bakers who want to impress their friends and family.
Making these cookies is both an art and a joy; the vibrant red color paired with the snowy white powdery sugar gives them an elegant look. Not only are they beautiful, but their flavor profile—chocolatey with a hint of tangy cream cheese—makes them a win for any dessert table. The steps are straightforward, ensuring that every home cook can recreate this festive favorite with ease.
Ingredients
- 2 cups all-purpose flour
All-purpose flour provides the structure for cookies, ensuring they hold their shape and have a satisfying chew. It forms the base of the dough. - 1/2 cup cocoa powder
Cocoa powder adds a rich chocolate flavor while enhancing the deep color of the cookies, making them more visually appealing. - 1 teaspoon baking powder
Baking powder acts as a leavening agent, helping the cookies rise slightly and maintain a light, airy texture. - 1/2 teaspoon baking soda
Baking soda contributes to the cookies' texture, ensuring tenderness while promoting the desirable crinkling effect during baking. - 1/2 teaspoon salt
Salt balances the sweetness and intensifies the overall flavor of the cookies, making every bite more enjoyable. - 1/2 cup unsalted butter, softened
Butter enriches the cookie dough, providing moisture and contributing to a rich flavor and tender texture. - 1 cup granulated sugar
Granulated sugar sweetens the cookies while also helping to achieve that classic crinkle effect with its caramelization during baking. - 1 large egg
Eggs contribute to the structure and moisture of the cookie, helping bind the ingredients together and providing richness to the flavor. - 1 tablespoon vanilla extract
Vanilla extract enhances the overall flavor profile, adding depth and warmth to the cookies. - 1 tablespoon red food coloring
Red food coloring is essential for achieving that signature vibrant red color which is visually striking and synonymous with red velvet. - Powdered sugar for dusting
Powdered sugar provides a beautiful finishing touch, adding sweetness and enhancing the cookies' festive appearance with its snowy coating.
Directions & Preparation
Step 1: Preheat your oven to 350°F (175°C).
Preheating the oven is crucial for ensuring even baking. An adequately heated oven allows the cookies to rise properly and develop that desirable crinkle top. Skip this step, and you risk cookies that spread too much or do not bake correctly.
Step 2: In a mixing bowl, whisk together the flour, cocoa powder, baking powder, baking soda, and salt.
Whisking the dry ingredients together helps to evenly distribute the leavening agents (baking powder and baking soda) and cocoa powder. This step is essential to ensure that the cookies rise evenly and have the rich chocolate flavor throughout.
Step 3: In a separate bowl, cream the softened butter and granulated sugar until light and fluffy.
Creaming butter and sugar aerates the mixture, which is vital for creating a light texture. This process incorporates air into the dough, helping your cookies rise and achieve the perfect texture.
Step 4: Add the egg, vanilla extract, and red food coloring to the butter-sugar mixture and mix until well combined.
Incorporating these wet ingredients enhances the moisture and flavor of the cookies. The egg acts as a binder, while the food coloring is crucial for that vibrant appearance.
Step 5: Gradually add the dry ingredients to the wet mixture, stirring until just combined.
Avoid overmixing at this stage; gently folding the ingredients helps maintain a tender texture. Overmixing can lead to tougher cookies. You want to see some streaks of flour remaining before finishing the mixing.
Step 6: Chill the dough in the refrigerator for at least 30 minutes. This helps firm up the dough, making it easier to handle.
Chilling the dough not only makes it easier to scoop and shape but also helps concentrate the flavors. It can also enhance the texture, resulting in cookies that bake up chewy and perfect.
Step 7: Scoop tablespoon-sized amounts of dough, roll them into balls, and then roll each ball in powdered sugar until well coated.
The powdered sugar coating is what gives these cookies their signature crinkle. It creates a beautiful contrast against the deep red, and as they bake, some sugar melts, further enhancing the visual appeal.
Step 8: Place the dough balls on a lined baking sheet, spacing them about 2 inches apart.
Proper spacing ensures that the cookies have enough room to spread and crinkle without merging together. This step is important for both appearance and texture.
Step 9: Bake for 10–12 minutes or until the cookies have crinkled and the edges are set.
Baking at the right moment is crucial; underbaking may lead to gooey centers while overbaking results in dry cookies. Keep an eye on them as they approach the 10-minute mark.
Step 10: Allow the cookies to cool on the baking sheet for a few minutes before transferring them to a wire rack to cool completely.
Cooling the cookies on the baking sheet lets them set while retaining a soft center. Moving them too soon can lead to breakage; patience pays off for perfectly textured cookies.

The Visual Appeal of Red Velvet Cookies
Red Velvet Crinkle Cookies don't just taste great; they are visually striking too. The vivid red dough, contrasted with the white powdered sugar, creates a festive look that draws in attention. This exciting color contrast makes them perfect for holiday celebrations, gatherings, or as a stunning dessert option to impress guests. Their whimsical appearance can make even the simplest occasions feel special.
Unlocking the Secrets of the Perfect Crinkle
Achieving the iconic crinkle on these cookies is about balance and technique. The combination of baking powder and baking soda works synergistically, creating a light, fluffy texture that promotes rising. As the cookies bake, the outer layer dries while the moisture inside expands, leading to those delightful cracks. It's essential to roll them in powdered sugar properly for a beautiful finish and pronounced crinkle.
Serving and Pairing Suggestions
These cookies are versatile and can be served warm with a scoop of vanilla ice cream for an indulgent dessert or alongside coffee and hot cocoa for a cozy treat. They also pair well with fruit-based desserts or even your favorite cheesecake slices, adding a vibrant contrast to the plate. Their luxurious flavor makes them a great addition to any dessert table, ensuring a festive atmosphere at any gathering.
FAQs
What makes my cookies spread too much while baking?
Cookies spreading too much can result from using too much butter or not chilling the dough adequately before baking. Make sure your butter is softened but not melted, and chill the dough for at least 30 minutes.
Can I use less food coloring without impacting the color too much?
Yes, you can adjust the amount of food coloring to your preference, but keep in mind that less will lead to a lighter color. You may end up with cookies that are only slightly red.
Why did my cookies turn out too dry?
If your cookies are dry, it may be due to overbaking. Keep a close eye on them as they approach the baking time and remove them once the edges are set while centers remain soft.
What should I do if my dough feels too soft to roll?
If your dough feels too soft, return it to the refrigerator for an additional 15–20 minutes. Chilling helps solidify the fats, making it easier to roll and shape.
Can I replace the granulated sugar with brown sugar?
Yes, you can substitute brown sugar for a richer flavor and added moisture. Keep in mind that it may change the texture slightly, making them denser.
What if I want a more intense chocolate flavor?
For a more chocolatey taste, consider adding an extra tablespoon of cocoa powder, but be cautious as it may alter the texture slightly. You can also balance with an additional touch of vanilla.
Conclusion
Red Velvet Crinkle Cookies are not just a treat; they're an experience that brings joy and color to any gathering. Their rich flavor and beautiful appearance make them a perfect companion for festive celebrations. With the easy steps outlined, even novice bakers can create these delightful cookies at home.
The combination of a fudgy interior and a classic crinkle exterior shapes a delightful cookie that resonates with many. Whether served at a holiday party or enjoyed with a cup of coffee, these cookies are bound to become a new favorite in your baking repertoire.
Recipe Card
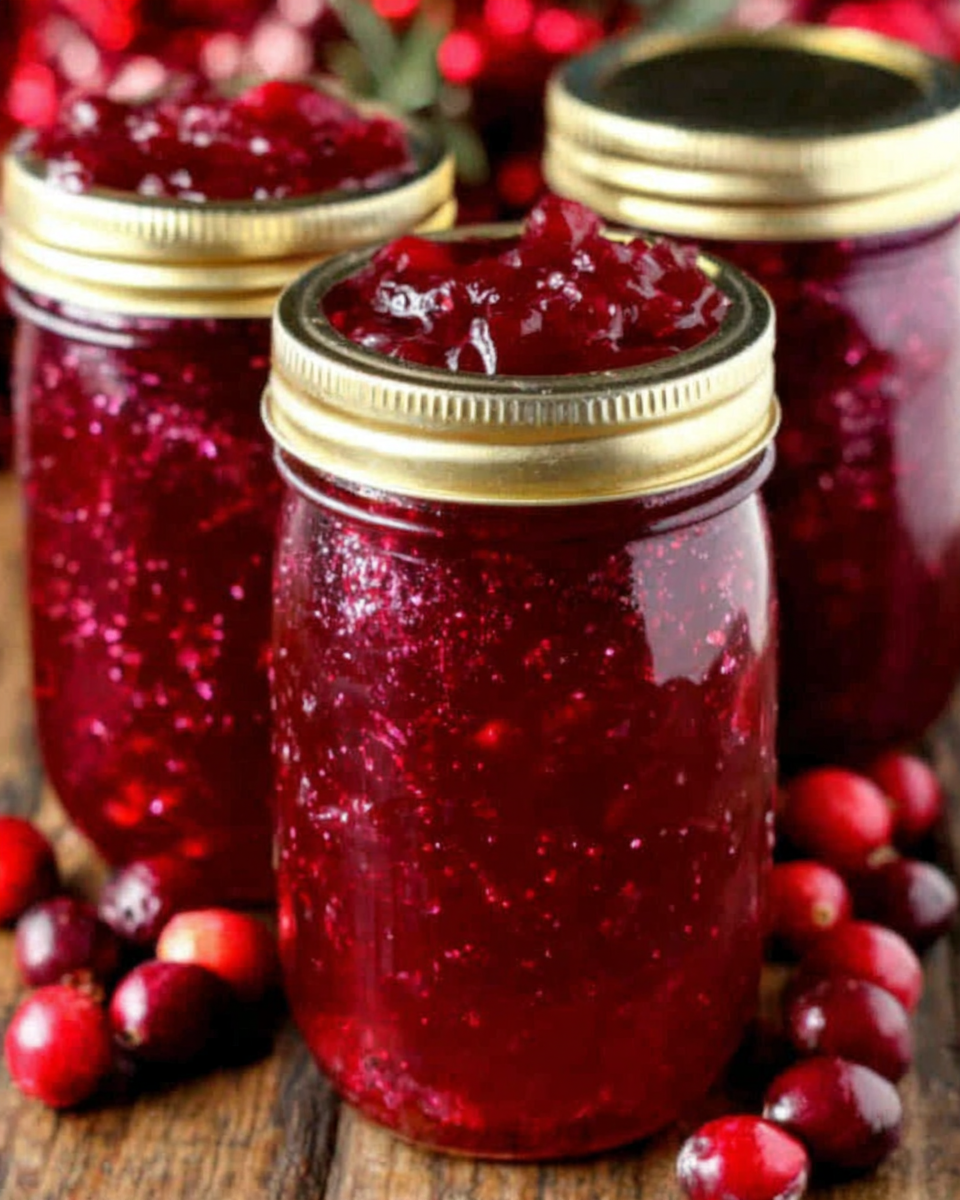
Traditional Amish Christmas Jam – Sweet and Spiced Delight
Ingredients
- 2 cups strawberries hulled and diced
- 1 cup raspberries
- 1 cup blackberries
- 2 cups sugar
- 1/4 cup lemon juice
- 1 teaspoon cinnamon
- 1/2 teaspoon nutmeg
- 1/4 teaspoon allspice
- 1/4 teaspoon cloves
- 1 package 1.75 oz fruit pectin
Instructions
- Prepare the fruit by washing and hulling.
- Combine the fruits in a large saucepan.
- Add lemon juice and sugar, then stir.
- Incorporate the spices and pectin.
- Bring to a boil over medium heat.
- Test the jam for readiness.
- Remove from heat and let cool slightly before jarring.
- Pour the jam into sterilized jars and seal them.
- Process jars in a boiling water bath for preservation.
Notes
Additional serving suggestions: pair with a crisp salad, garlic bread, or roasted seasonal vegetables for balance.
For make-ahead, prep components separately and assemble just before heating to preserve texture.
Taste and adjust with acid (lemon/vinegar) and salt right at the end to wake up flavors.